Distance
About 730 km via the Western Highway.

 Toyota YarisEconomy
 Toyota CorollaCompact
 Hyundai KonaCompact SUV
 Toyota RAV4SUV
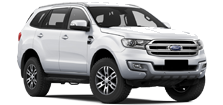 Ford Everest7-Seater
 Toyota LandCruiser Prado4WD
 Ford Ranger4WD
 Kia Carnival7-Seater
 Toyota HiAceVan / Passenger Van
 Toyota CamryHybrid
 BMW 3 SeriesLuxury
 BMW X3Luxury
 Mazda MX-5Convertible
 Tesla Model 3Electric (EV)Toyota RAV4 HybridHybrid
730 km, 8.5–9.5 h. Compare fees, routes and total price.
A straightforward inland drive past the Grampians, or the famous Great Ocean Road for a two- or three-day trip.
About 730 km via the Western Highway.
8.5–9.5 h without long breaks.
Often 3 days or more.
A$120–220, depending on supplier and season.
Indicative figures only. The final fee is shown before you pay.
Two ways to drive it. Pick a route to see every stop with its distance from Melbourne, driving time, the leg that follows and a day plan.
Western and Dukes highways, through Ballarat and Horsham.
Leave via the Western Freeway, avoiding the evening peak.
Gold-rush city and Sovereign Hill. Coffee and fuel.
Lunch stop near the Grampians.
Just over the SA border. Note the fruit-fly quarantine rules.
Murray River crossing. Last big break before Adelaide.
Return at the airport or CBD, via the Adelaide Hills.
Great Ocean Road, then the Limestone Coast. Plan two nights.
Head to Geelong and Torquay.
Start of the cliff-top Great Ocean Road.
Lunch and the Otway rainforest.
Twelve Apostles and Loch Ard Gorge. Overnight here.
Historic port and Cape Bridgewater.
Blue Lake and sinkholes. Good second overnight.
Seaside town on the Limestone Coast.
Return at the airport or CBD.
Approximate distances and times without long breaks. Driving times vary with traffic, roadworks and weather.
Your total is the rental price plus the one-way fee and any optional extras you choose. The exact amounts appear in your quote for your dates, car and locations.
The base price for your dates and vehicle category.
Charged when you return the car to a different location. Your quote shows the actual fee for your booking.
Protection and add-ons are optional and listed separately, so you can see what each one adds.
A one-way fee is added when you drop the car in a different city. For Melbourne to Adelaide it is usually higher than for short regional routes, and it changes by supplier and season.
| Category | Daily rate from | Typical one-way fee |
|---|---|---|
| Economy | A$39 | A$120–190 |
| Compact | A$46 | A$120–200 |
| SUV | A$68 | A$150–220 |
| Van | A$95 | A$190–270 |
Indicative only. The final fee is shown before you pay. Relocation deals can reduce or remove it.
Four things worth knowing before you set off.
Australia drives on the left, including at roundabouts and when you pull back onto the road after a stop.
Follow posted limits and changing road conditions. Speed limits vary by state, road type and area, so always follow the signs.
Don't rely on finding fuel exactly when your tank is low. Fill up in larger towns, and check the fuel policy in your rental agreement.
Long-distance driving requires regular rest. Share the driving if you can, and stop when you feel tired.
Important: Speed limits are determined by road signage and conditions; always follow the current posted limit.
Practical checks travellers often make too late.
Drop-off locations in Adelaide may have different operating arrangements. Pick the one that suits your arrival.
Don't compare only the daily rental rate. Compare the total price with the one-way fee included.
Particularly important if your arrival time is late. Confirm how and where to return the car and the keys.
A 730 km trip can use a lot of your allowance once you add side trips. Check what your rental includes.
The direct drive is about 8.5–9.5 h. Stops, meals and fuel breaks add up, so plan your days to match.
Some vehicle categories may have different one-way rules. Check before you confirm a category.
Record existing damage before leaving, and make sure it is noted on your paperwork.
Keep a copy on your phone and the paper copy in the car, in case you are asked for it.
Short answers. Details depend on your supplier and booking.
About 8.5–9.5 h on the Western Highway, without long breaks.
Often yes, at an airport or city depot in Adelaide. Confirm the drop-off hours and any surcharge.
Only CityLink if you use it leaving Melbourne.
Compare suppliers, flexible dates, both directions and relocation deals.
Yes. Many suppliers allow different pickup and drop-off locations, and a one-way charge may apply.
It varies by supplier, route, vehicle and dates. Any one-way charge is shown before you book.
Usually not. Tolls are typically charged separately.
Many agreements restrict or exclude them. Check your conditions before you go.
Often restricted. Check terms, including for Tasmania ferries.
The maximum you may pay for damage unless you reduce it. It varies by supplier and vehicle.
Usually, if they meet age and licence rules. A fee may apply.
Some locations allow it with a key drop. Confirm before you book.
Generally yes with a valid licence. An English translation or permit may be needed.
Short answers. Details depend on your supplier and booking.
Often yes, at an airport or city depot in Adelaide. Confirm the drop-off hours and any surcharge.
Yes. Many suppliers allow different pickup and drop-off locations, and a one-way charge may apply.
Short answers. Details depend on your supplier and booking.
Only CityLink if you use it leaving Melbourne.
Compare suppliers, flexible dates, both directions and relocation deals.
It varies by supplier, route, vehicle and dates. Any one-way charge is shown before you book.
Usually not. Tolls are typically charged separately.
The maximum you may pay for damage unless you reduce it. It varies by supplier and vehicle.
Short answers. Details depend on your supplier and booking.
About 8.5–9.5 h on the Western Highway, without long breaks.
Many agreements restrict or exclude them. Check your conditions before you go.
Often restricted. Check terms, including for Tasmania ferries.
Short answers. Details depend on your supplier and booking.
Usually, if they meet age and licence rules. A fee may apply.
Some locations allow it with a key drop. Confirm before you book.
Generally yes with a valid licence. An English translation or permit may be needed.
880 km · 9–10 h · A$150–250 typical fee
880 km · 9–10 h · A$150–250 typical fee
75 km · about 1 h · A$0–60 typical fee
660 km · 7–7.5 h · A$120–220 typical fee
1,670 km · 18–19 h · A$300–500 typical fee
730 km · 8.5–9.5 h · A$120–220 typical fee
1,375 km · 14–16 h · A$300–500 typical fee
1,530 km · 16–17 h · A$350–650 typical fee